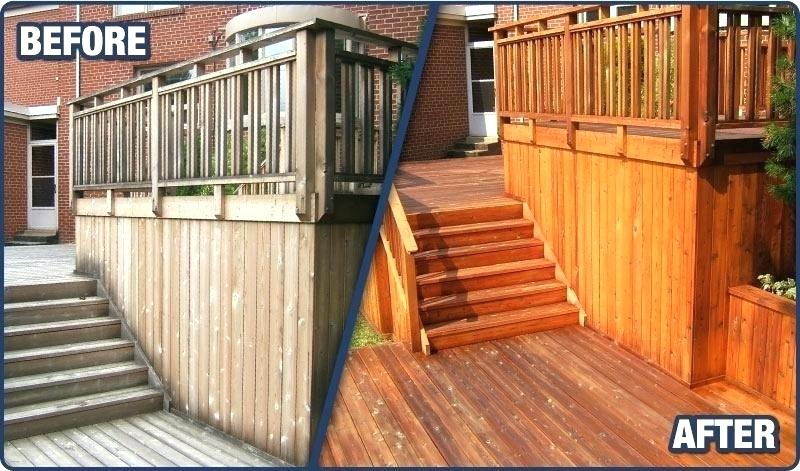
You can always make your deck more eye-catching by coating it with wood stain. In addition to making the deck more appealing, the wood stain will further protect by reducing excessive moisture and preventing the growth of mold and mildew. But you cannot maintain the look and feel of the outdoor living space without staining the previously stained deck at periodic intervals. While staining the previously stained deck, you must choose the right wood stain. At the same time, it is also important to restain properly to make it look like a new piece of furniture.
How to Stain a Previously Stained Deck in 5 Simple Steps
Step 1: Decide the Best Time to Restain the Deck
When you decide to restain your deck, it is always important to decide the best time to start the staining process. You can easily decide the right time to start deck restaining process by referring to the instructions provided by the stain manufacturers. Most manufacturers recommend users to apply stain when the temperature remains between 60 degrees to 80 degrees. Likewise, they advise users not to start the restaining process if rain is expected in 24 hours. You must choose the right time to maintain and extend the wood stain.
Step 2: Prepare the Deck Surface for Staining
There are always chances that the deck may need some type of repair or maintenance before getting stained. You must check the condition of the deck and perform the required repair and maintenance work. Also, you need to clean and prepare the deck surface properly before starting the restaining process. You can easily remove stains, mildew, and dirt from the deck surface using a power washer. Also, you can rinse various parts of the deck surface manually by using a solution of deck cleaner and water. Once the deck is clean, you must allow the deck to dry for two to three day before applying the wood stain.
Step 3: Pick the Right Wood Stain
You have the option to choose from wood stain with a variety of finishes – solid and semi-transparent. But you must choose the wood stain according to the current finish and existing stain. If the existing stain is light, you can apply the same stain or a darker stain without additional preparation. But you have to sand the wood thoroughly to remove the existing stain completely and apply a lighter-color. On the other hand, you can cover the existing stain by applying a solid or semi-transparent stain. You must evaluate various types of wood stains to make your deck appear fresh and distinct.
Step 4: Apply the Wood Stain
When you start applying the wood stain, it is important to evaluate the adhesive. You can easily test the adhesive by applying a small amount of wood stain. You also need to remove the protective finish to make the adhesive work and stain to adhere. It is always advisable to apply the stain on small areas using a brush, roller, or paint pad. However, you can still apply long and smooth strokes. Further, you must allow the first coat to dry thoroughly before applying the second coat.
Step 5: Maintain the Wood Stain
In addition, to stain a previously stained deck properly, it is also important to maintain the coat at regular intervals. It is a good idea to maintain the coat every six months to make the deck appear fresh and appealing. However, you must clean the deck surface thoroughly before applying the maintenance coat.
On the whole, you can always make the deck appear like a new piece of furniture by retaining its surface in the right way. However, it is also important to maintain the stain properly to keep your exterior living space appealing.
If you are living in Charlottesville or Albemarle County VA, you can always avail Advantage Home Contracting’s Deck & Porch Installation & Maintenance Service to stain the previously stained deck without putting extra time and effort.